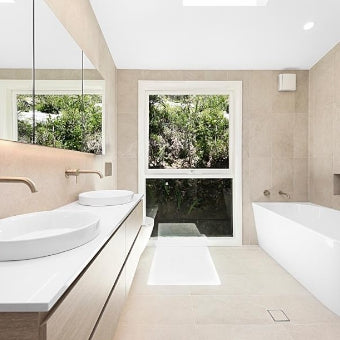
Prepare Floors And Walls For Tiling.


Tiling can transform any space, offering both style and durability. However, getting those beautiful tiles to stick and last requires meticulous preparation. Whether you're tackling walls, floors, or a bathroom, this guide will walk you through the essential steps to prep like a pro.

Essential Tools For Tiling Preperation
Before you begin, arm yourself with the right tools. While specifics depend on the subfloor or wall type, here’s a general checklist:
- Safety gear: goggles, mask, gloves
- Hammer and chisel (for old tile removal)
- Putty knife and flat pry bar
- Level and fine-grit sandpaper
- Bucket, sponge, and cleaning solution
- Primer suitable for the surface and adhesive
- Broom and degreaser solution
Preparing Walls For Tiling.
Different wall surfaces require tailored preparation techniques. Follow these steps based on your wall type:
Painted Walls
- 1. Perform a paint adhesion test. If paint peels off, scrape the loose sections.
- 2. Clean thoroughly with mild detergent and a damp cloth.
- 3. Sand the surface lightly to improve adhesion.
- 4. Apply a primer designed for tiles.
Plasterboard Walls
- 1. Inspect for cracks and fill them with a patching compound.
- 2. Sand patched areas smooth for a uniform surface.
- 3. Use a primer compatible with plaster before tiling.
Brick Walls
- 1. Scrub the wall with a stiff brush to remove dust and debris.
- 2. Address cracks in mortar joints by repointing with fresh mortar.
- 3. Apply a penetrating sealer to enhance adhesion and reduce moisture absorption.
Walls with old tiles removed
- 1. Scrape off residual adhesive or mortar.
- 2. Clean the exposed surface thoroughly and allow it to dry.
- 3. Prime the wall based on its material (e.g., drywall, plywood, or cement sheeting).
Preparing Floors For Tiling
The approach to floor preparation depends on the subfloor material and whether you’re tiling over an existing floor.
When to Remove Existing Flooring
- Remove: Carpet, vinyl, and linoleum — these aren’t suitable tile substrates.
- Consider: Existing tiles — remove if they are uneven or cracked.
- Keep: Concrete, chipboard, or solid timber in good condition.
Concrete Floors
- 1. Inspect for cracks. Fill small ones with patching compound; larger issues may need professional repair.
- 2. Level uneven floors using a self-leveling compound.
- 3. Ensure the floor is completely dry; use a moisture barrier for wet areas.
- 4. Clean with a degreaser and rinse thoroughly before applying primer.
Chipboard Floors
- 1. Ensure the chipboard is firmly secured to floor joists.
- 2. Apply a decoupling mat to prevent moisture damage and cracking.
- 3. Seal seams between mats and prime for improved adhesive performance.
Tiles Over Existing Floors
- Wooden Floors: Secure loose boards, level uneven areas with plywood, and eliminate moisture issues.
- Existing Tiles: Pass the “tap test” to ensure tiles are firmly adhered. Sand lightly for better adhesion and clean thoroughly.
Waterproofing Bathroom For Tiling
Wet areas like bathrooms require robust waterproofing to prevent leaks and ensure tile durability. Common options include:
- Liquid Waterprooflng Membranes: Paint-on solutions for a seamless barrier.
- Sheet Membranes: Rolls adhered to the substrate with sealed seams.
- Shower Tray Kits: Pre-sloped bases with integrated waterproofing membranes.
Always follow manufacturer instructions and consult professionals for complex projects.
Ready To Tile? Shop Evo Tile + Stone
Once your surfaces are prepped and ready, it’s time to bring your vision to life. Evo Tile and Stone offers an extensive selection of premium tiles to suit any design style. Shop online and enjoy hassle- free delivery, or visit our showroom to explore in person.
Need help with design or product selection? Contact our team for expert guidance.
FAQs
Can I tile over laminate flooring?
Laminate isn’t suitable for tiling due to its moisture sensitivity and tendency to warp.
How long after waterprooflng can I start tiling?
Most waterproofing membranes require 24-48 hours to cure. Check the product instructions for specifics.
What are common mistakes in tiling preparation?
- Neglecting to level the surface or address cracks.
- Skipping cleaning steps, leading to poor adhesion.
- Using the wrong primer for the material type.
By following these steps, you’ll lay the groundwork for a flawless tiling project that enhances your space for years to come. Let Evo Tile and Stone be your partner in transforming your home!
Keep Reading
Previous Blog
A Guide For Understanding Waterproofing Solutions For Bathroom Tiles.
Introduction A well- designed bathroom not only looks great but also stands the test of time. One of the most critical aspects of ensuring your bathroom remains beautiful...
Next Blog
Small Bathroom? Big Impact with the Right Tiles
Introduction Designing a small bathroom doesn’t mean you have to sacrifice style or function. With the right bathroom tiles, you can create a space that feels light, open,...
- Choosing a selection results in a full page refresh.
 +61 (0) 2 9949 5354
 516 Sydney Road, Seaforth NSW
 Free Design Appointment


